How to Disable UAC in Windows for Cheats
UAC watches over any action that requires administrator rights: installing programs, changing system files, writing to protected folders. For each such action, Windows shows a pop-up asking for confirmation. Cheat loaders work directly with the game process's memory and system components, so they run with administrator rights, and an enabled UAC either blocks part of their actions or keeps interrupting the launch with confirmation prompts.
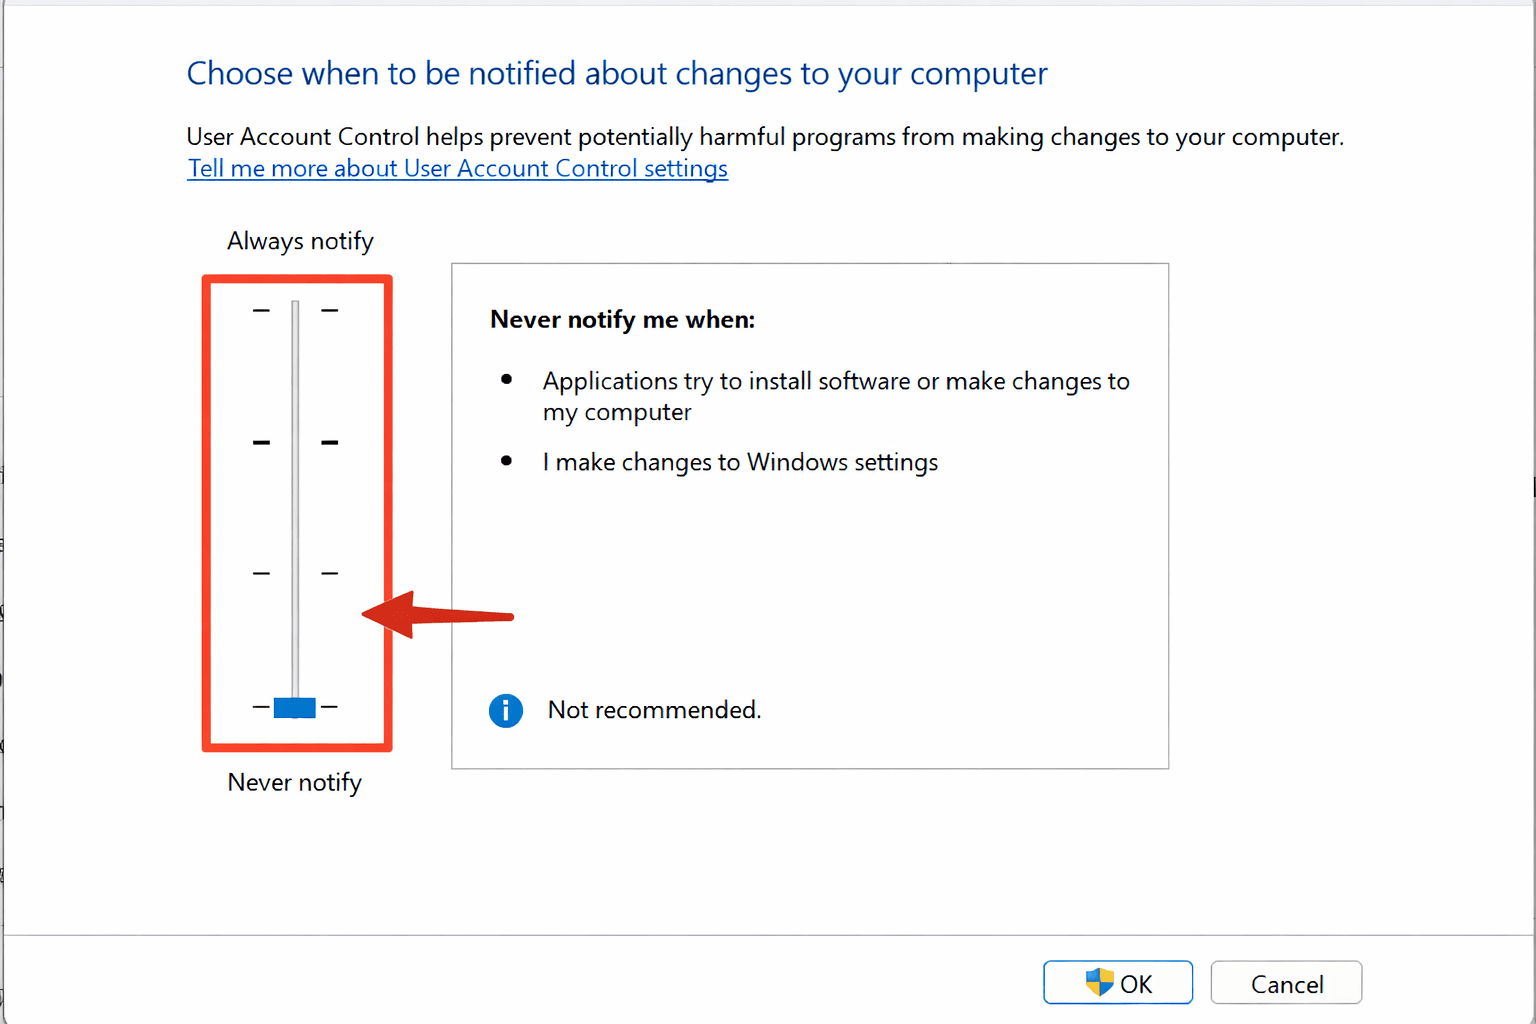
UAC, Windows User Account Control, is the system component that displays the “Do you want to allow this app to make changes to your device” prompt. In certain cases, it prevents a cheat loader from obtaining the permissions required to interact with the game’s memory. Below are three working methods to disable UAC on Windows 10 and 11, plus a way to turn the protection back on when you need it again.
Disabling UAC reduces your system’s defence against unauthorized changes. Carry out this operation on a gaming computer, not on a work or banking machine, and be sure to re-enable the protection once you finish playing.
What UAC Is and Why It Interferes with a Cheat
UAC monitors any action that needs administrator rights: program installation, system file modification, writing to protected folders. For each such action, Windows shows a pop-up asking for confirmation. Cheat loaders interact directly with the game process memory and system components, so they run with administrator privileges. With UAC enabled, it either blocks some of their operations or continuously interrupts the launch with permission prompts.
If the cheat fails to start, hangs on launch, or closes silently without an error, disabling UAC often resolves the issue more quickly than any other configuration step. This is not the only reason for failed launches, but it is one of the most frequent and the fastest to verify: the fix takes no more than a couple of minutes, compared to removing third-party antivirus software or reconfiguring core isolation.
How to Disable UAC: Three Methods
Method 1. Through the Control Panel
Press Win + R, type control, and press Enter to open the Control Panel. Navigate to the “User Accounts” section and open “Change User Account Control settings.”
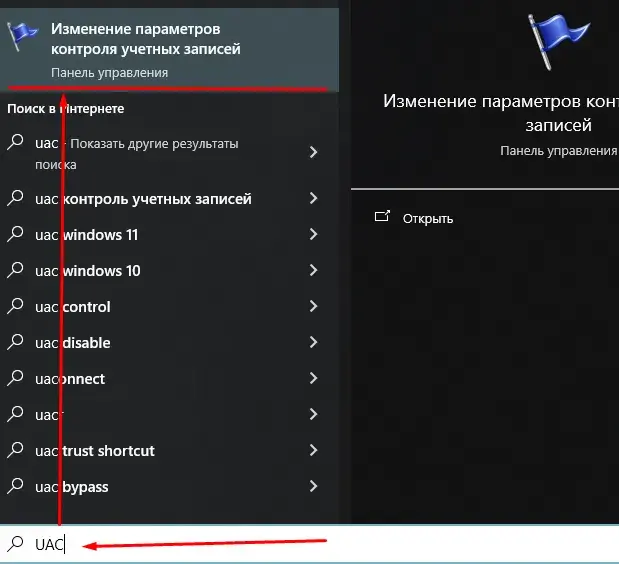
Searching for UAC in the Windows Start menu
Opening “Change User Account Control settings”
In the window that appears, drag the slider all the way down to the “Never notify” position and click OK. Confirm the system prompt if it appears one last time before deactivation.
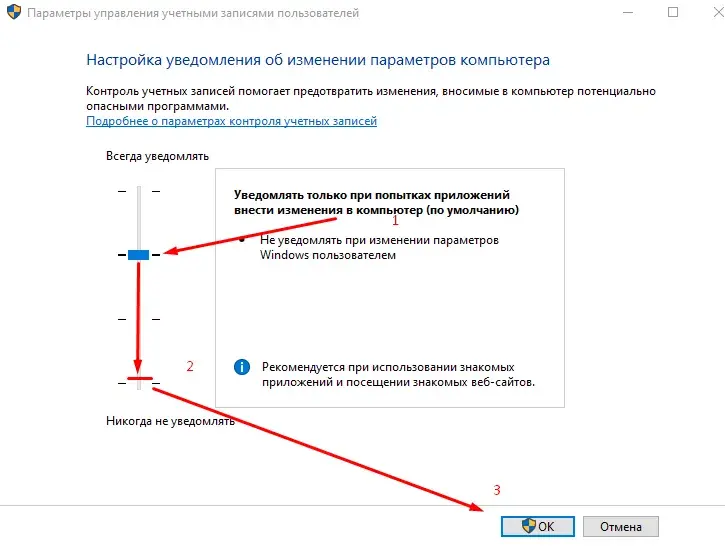
UAC slider lowered to the Never notify position
Lower the slider and click OK
Restart the computer so that the changes take full effect. This method is usually sufficient to run most loaders.
Method 2. Through the Registry Editor
Careless registry modifications can break Windows. Edit only the specified value and create a system restore point beforehand if you do not already do so.
Press Win + R, type regedit, and press Enter. In the opened editor, browse to:
HKEY_LOCAL_MACHINE\SOFTWARE\Microsoft\Windows\CurrentVersion\Policies\System
Locate the EnableLUA value and set it to 0. If the value is not present in the list, create a new DWORD (32-bit) value with the same name and data. Restart the system after the change.
Method 3. Through the Command Prompt
Open the Start menu, type cmd, right-click “Command Prompt,” and select “Run as administrator.” Execute the command:
reg.exe ADD HKEY_LOCAL_MACHINE\SOFTWARE\Microsoft\Windows\CurrentVersion\Policies\System /v EnableLUA /t REG_DWORD /d 0 /f
The command accomplishes the same thing as editing via the Registry Editor, but in a single step, without manually hunting for the value. Restart the computer after running it.
How to Turn UAC Back On
When you require protection again — for example, when handling work documents or performing banking operations on the same computer — restore UAC using one of these two methods:
Open the Control Panel following the same path as in Method 1 and raise the slider back to the original notification level.
Run the following command in an elevated Command Prompt to reset the value to one:
reg.exe ADD HKEY_LOCAL_MACHINE\SOFTWARE\Microsoft\Windows\CurrentVersion\Policies\System /v EnableLUA /t REG_DWORD /d 1 /f
In either case, the system will request a restart. Accept it so that UAC takes effect immediately, rather than waiting for the next shutdown.
If the cheat still fails to launch after UAC is disabled, the problem most likely lies with your antivirus or Windows Defender. Refer to the full guide on disabling Windows protection for a cheat, where every step is laid out in order, from UAC to the removal of third-party antivirus solutions.
Frequently Asked Questions About Disabling UAC
Do I really need to disable UAC to run a cheat?
Not always; some loaders work even with UAC enabled. However, if the software hangs at startup, closes silently, or throws an access error, disabling UAC is one of the first steps worth checking.
Which method of disabling UAC is the most reliable?
All three methods alter the same system setting; the only difference lies in the interface. The Control Panel is simpler for a beginner, while the registry and command prompt are more convenient when you need to replicate the configuration across multiple computers.
Is it safe to keep UAC disabled all the time?
On a dedicated gaming computer, the risk is minimal. On your main work PC or a laptop containing personal data, it is advisable to turn UAC back on after your gaming session, especially if you install software from various sources.
The cheat still won’t launch after disabling UAC — what should I do?
Check Windows Defender and third-party antivirus programs, as they block loaders more frequently than UAC. The full sequence of steps is detailed in the general guide to disabling Windows protection, or you can contact us on Telegram (200+ members) or Discord (637+ members).
Do I need to disable UAC again after a Windows update?
Typically, no; the setting value persists through updates. However, after a major Windows version update, it is wise to verify the slider position in the Control Panel before launching the cheat, just to be safe.